
First off, I still spell a couple of words the ''old'' way. Theatre and mitre(bite me spell check)...when did the spelling change to :e r"? Americans, what are you gonna do with us, eh? LOL
It's been a very busy time for me....son got hitched and tons of family visiting. I am kind of taking a breather today and paying bills, blogging, facebooking, cleaning........because this weekend is the reception, I will be making some rustic, shabby/chic items for the decor and even more family will be here for the weekend for that!. I am tired just thinking about it. LOL

As promised, oooohhhhh so long ago, part two. The technique works pretty good with us non professional seamsters too.
I followed the directions from this issue of Threads Magazine.
This is how this works in the ''real world''; distractions, fussy fabric, temperamental sewing machines.....not perfect conditions and professional sewistas. LOL

Start by deciding how deep you want your hems, then press the heck of of the them.
You will use the pressing lines as guides.
In the article, the make some paper templates to keep your hems really even.
I am making receiving blankets, I winged it. ;-)

See the bulking corners?
I used to just sew that down...ha!

I am using this scrap piece of quilter's cotton for ease and to show you the hems do not have to be even or even the same size to work. I know, right!
Mark where the fabric intersects

Open it up but leave one fold, folded. See that nice sharp corner, that is your goal point.
On the flannel, I used some fading marker to highlight the lines and the intersection since the line wasn't as crisp. use your favorite method..pins, ink, thread tacks.....
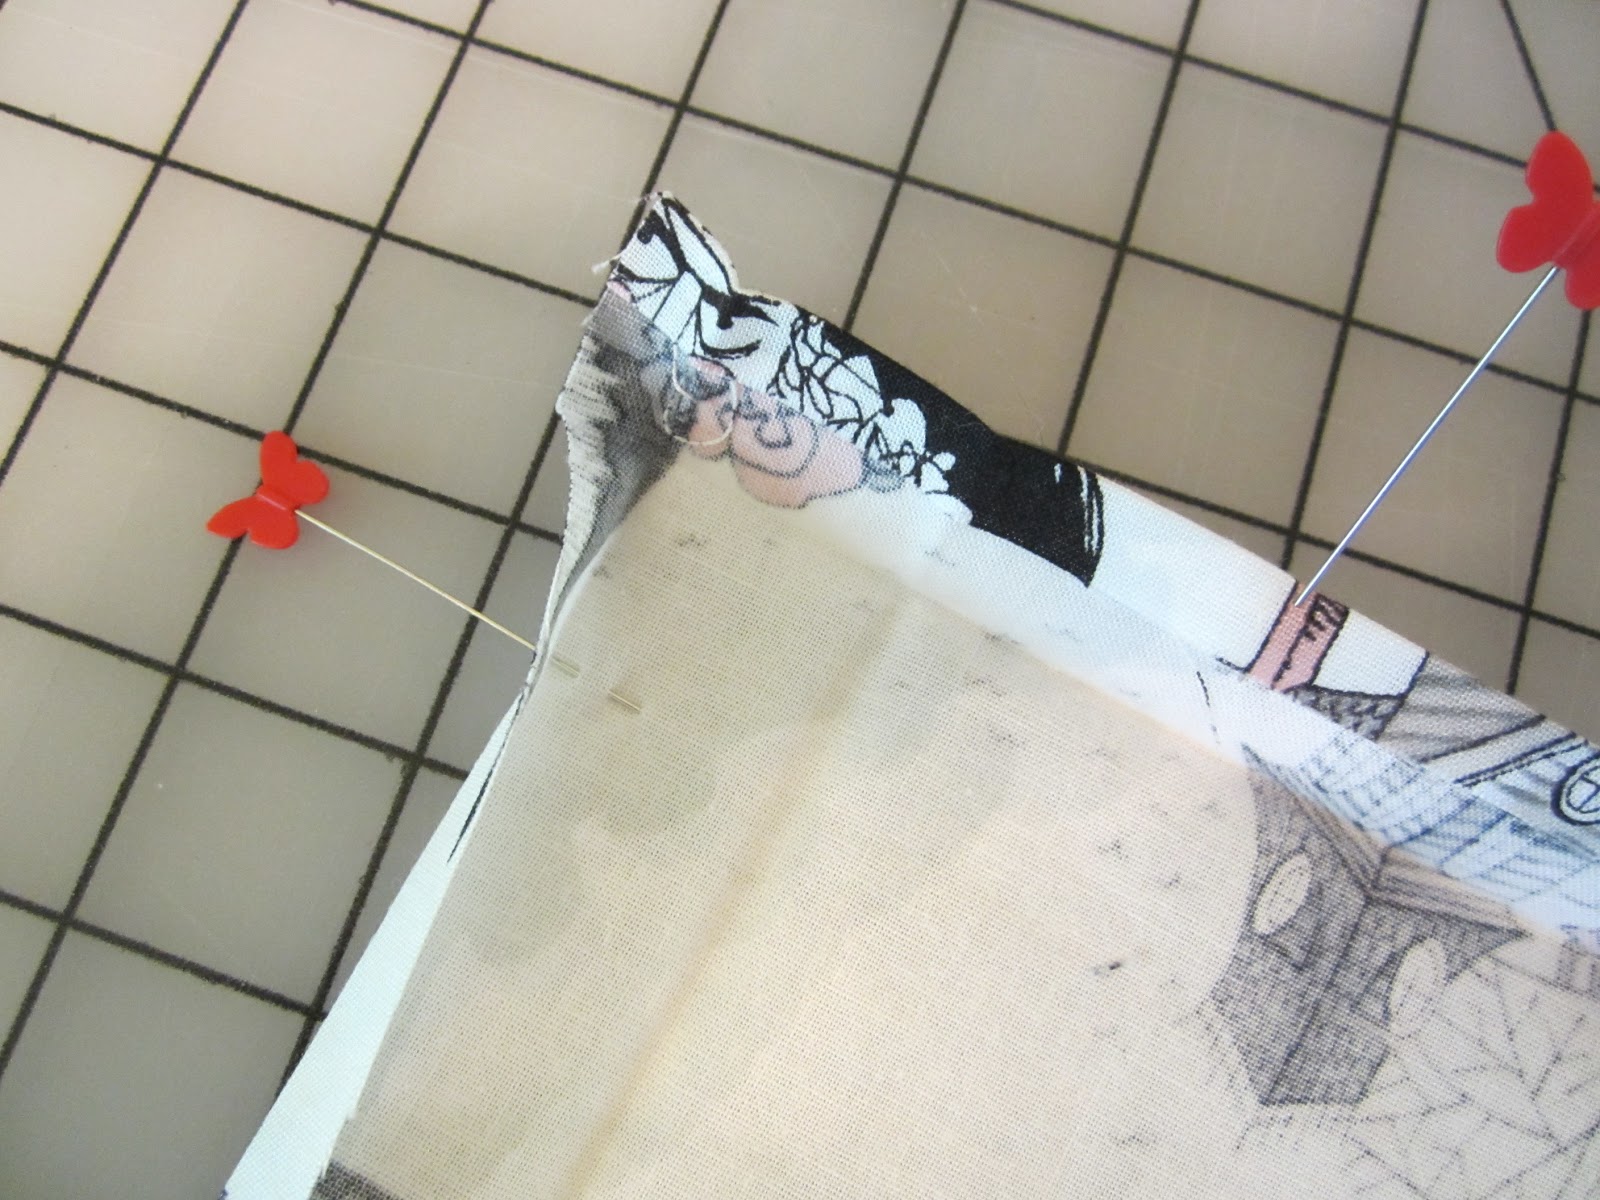
Fold right sides together and hatch up the pins. If you hems are not even, your corner will look wonky....it's okay

Mark from the pins to where the fold lines meet

Sew down said line


Give it a quick turn to see if it worked, adjust if necessary.
I had to on one or two flannel corners but taking it in a little bit since the fabric was bulky and I couldn't get a nice, clean line.

Trim and press open.
Confession time, I didn't press open.

Ta-daaaaaa

all pressed and perfect!

Ready for assembly line sewing

After your corners are all trimmed and pressed, let the top stitching begin........

Front and back view

Out of 17 corners, I only had one that was cacadoodledoo
Since these receiving blankets are for my grammy stash, I went with it.
I can't be perfection all the time, right. hahahahaha

The finished products.

Yes, skulls for my baby girl!!
I hope this technique helps you like it helped me!
happy sewing.....
Very nice indeed :) Gramma....skulls? really? What were you thinking???
ReplyDeleteI was thinking....awesome!!!
Deleteand is that the Ghastlies I spy? What a fun Grandmother;^)
ReplyDeleteI used your first tut for place mats- it worked wonders.
We have a Centre St and for some reason I spell creme "wrong"