Showing posts with label tips. Show all posts

Monday, July 16, 2012

From clunky and chunky to sleek and polished.... Mitred Corner Tutorial, Part 2

First off, I still spell a couple of words the ''old'' way. Theatre and mitre(bite me spell check)...when did the spelling change to :e r"? Americans, what are you gonna do with us, eh? LOL
It's been a very busy time for me....son got hitched and tons of family visiting. I am kind of taking a breather today and paying bills, blogging, facebooking, cleaning........because this weekend is the reception, I will be making some rustic, shabby/chic items for the decor and even more family will be here for the weekend for that!. I am tired just thinking about it. LOL


As promised, oooohhhhh so long ago, part two. The technique works pretty good with us non professional seamsters too. 


I followed the directions from this issue of Threads Magazine.
This is how this works in the ''real world''; distractions, fussy fabric, temperamental sewing machines.....not perfect conditions and professional sewistas. LOL

Start by deciding how deep you want your hems, then press the heck of of the them. 
You will use the pressing lines as guides.
In the article, the make some paper templates to keep your hems really even. 
I am making receiving blankets, I winged it. ;-)

See the bulking corners?
I used to just sew that down...ha!

I am using this scrap piece of quilter's cotton for ease and to show you the hems do not have to be even or even the same size to work.  I know, right!
Mark where the fabric intersects

Open it up but leave one fold, folded. See that nice sharp corner, that is your goal point. 
On the flannel, I used some fading marker to highlight the lines and the intersection since the line wasn't as crisp.  use your favorite method..pins, ink, thread tacks.....
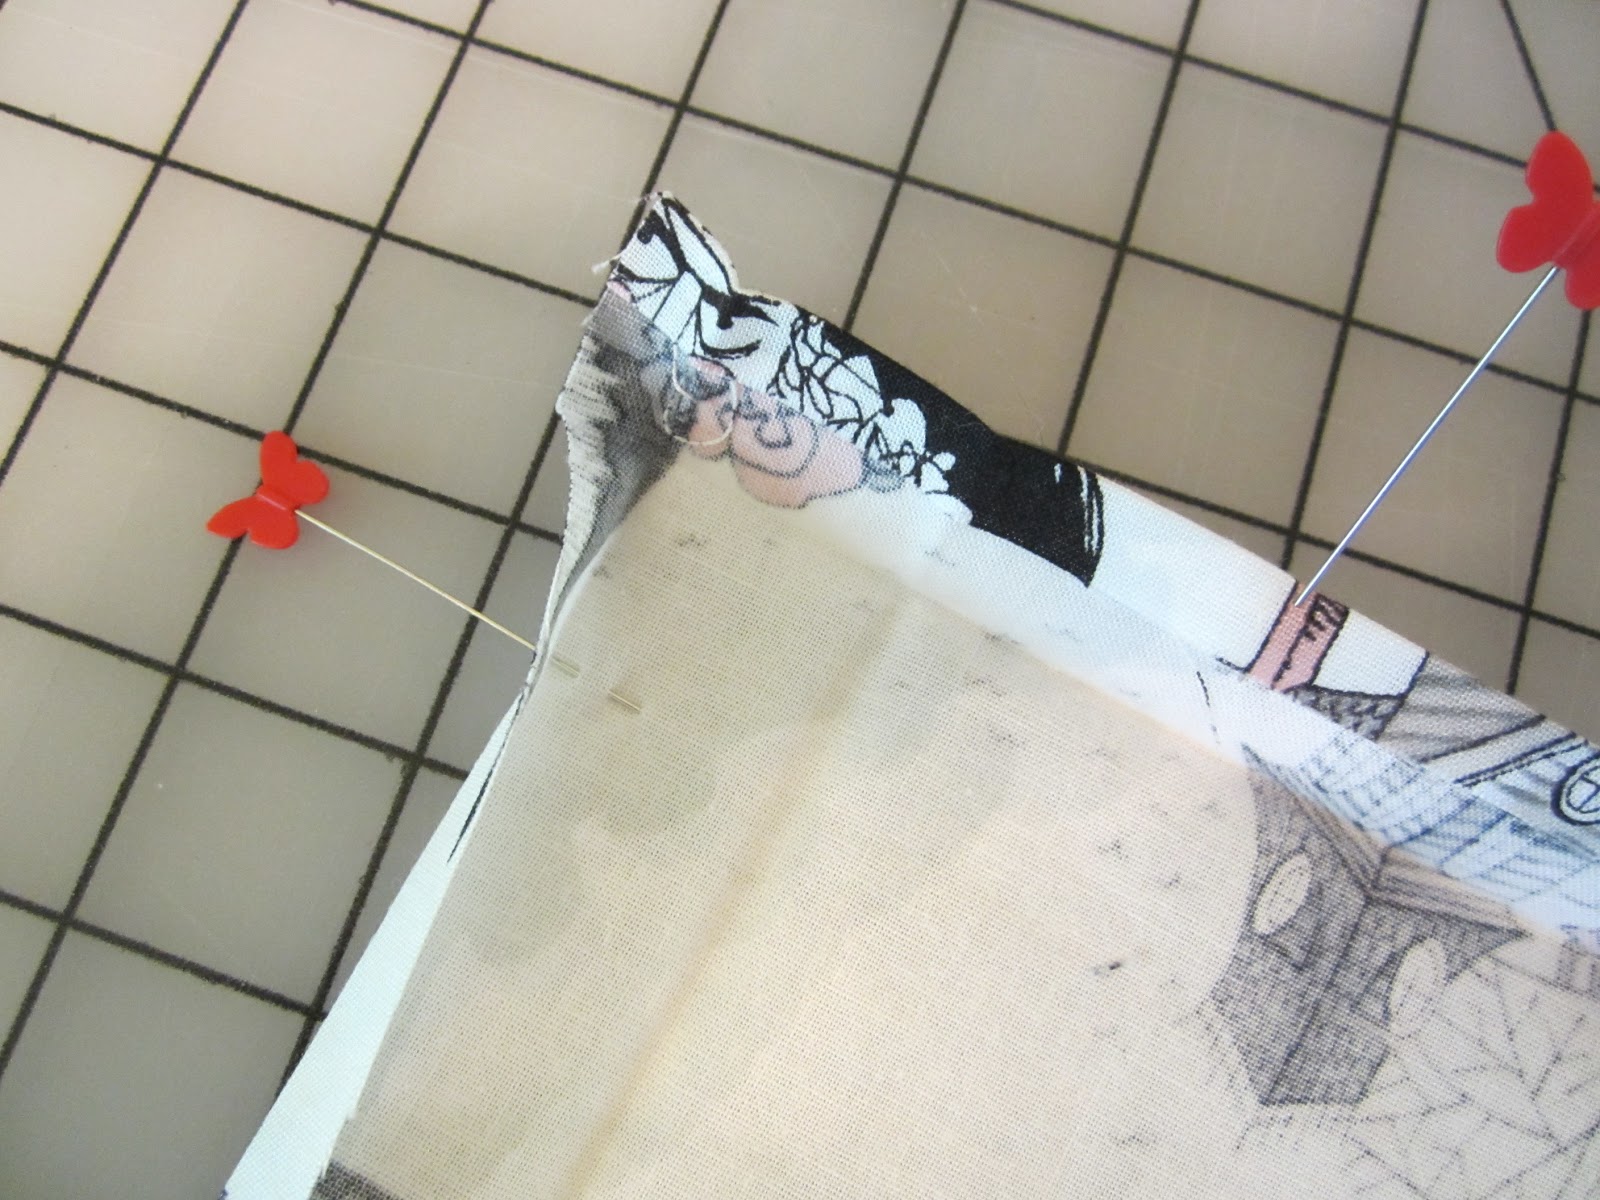
Fold right sides together and hatch up the pins. If you hems are not even, your corner will look wonky....it's okay

Mark from the pins to where the fold lines meet

Sew down said line


Give it a quick turn to see if it worked, adjust if necessary. 
I had to on one or two flannel corners but taking it in a little bit since the fabric was bulky and I couldn't get a nice, clean line.

Trim and press open.
Confession time, I didn't press open. 

Ta-daaaaaa

all pressed and perfect!


Ready for assembly line sewing 

 After your corners are all trimmed and pressed, let the top stitching begin........

Front and back view


Out of 17 corners, I only had one that was cacadoodledoo
Since these receiving blankets are for my grammy stash, I went with it. 
I can't be perfection all the time, right. hahahahaha

The finished products.
Yes, skulls for my baby girl!!

I hope this technique helps you like it helped me!

happy sewing.....

Saturday, July 7, 2012

Coming soon.....new sewing tutorial

 From clunky and chunky to sleek and polished....
Mitered Corners - Part Two.


Threads magazine has been a wealth of information over the years. A new (to me) little technique here and there have made my sewing better and easier. I would love to say faster, but I am soooo not fast and probably never will be. LOL 


I adapted the mitred corner technique at Christmas time for a single fold of fleece. Now I am using this wonderful technique on some flannel baby blankets. But it will work on any corner, on any fabric, at any angle.....I will say that the more stable the fabric, the better the result.


I am making several flannel receiving blankets so I should have a pretty good handle on this wonderful technique before the weekend is over. I will take lots of pictures and post how it's done.


This technique is from a threads magazine....several years ago...totally brill!
(June/July 2008  #137, page 65) It has a very colorful tote bag on the cover.


Practice, here I come...............

The tutorial is now up, click this sentence!!

Wednesday, June 6, 2012

Easiest Flat-Felled Seam....Ev-er!

Seriously. Awesome.

I was having a late breakfast and doing a little channel surfing when I came across a sewing show. I saw Gertie's face for just a sec, so I stayed put. The show is on PBS stations and it's called:
It's Sew Easy.  Yes, my dvr is now set. How did I not know about this show?  


Anyway, this lady was showing some industry techniques for sewing without pins. 
Anyone who knows me, knows I am an over pinner extraordinaire! I have issues, okay. 
One of them is a pincushion addiction, so that requires lots of pins. :-)


Okay, now the how-to part for the easiest flat-felled seam ev-er.  I used a curved seam just to see if it worked as well as on a straight seam cuz sometimes us chicks have curvy seams that match our curvy parts....am I right?  Here goes......


Place your fabrics wrong sides together with the lower fabric sticking out about 3/8"

Fold over and stitch really close to the raw edge 
With a curve, be really mindful that you keep an even amount showing

All done with part one

Now, open the seam

Fold over so the raw edge is covered

Sew along the edge. Again, be mindful of the under parts

The finished seam


I know, I know!!! 
I was so excited I just had to share.
Now, go and flat-fell something....no pinning, no ironing, just sewing........

Saturday, May 5, 2012

Prom Dress....an Adventure in Hemming

The Dot's (short for daughter) good friend is height challenged. Even in nose-bleed high heels, she needed 3" taken off her dress. This is how I mark my hems so I can serger (in this case, a rolled hem) a straight line.


First off, I had her put on her shoes and I marked the length. All that money for a dress and that was one uneven hem, let me tell you!

I go to my sewing machine and set it on a medium length basting stitch and I loosen the tension a bit so the extra fine fabric doesn't get all puckery.  I use post-its or tape to mark how deep I want the hem and then I sew a line of stitching to mark my place.


I hang it up and see if it's even. I'll mark any corrections with pins or chalk at this point.
Looks pretty good to me!  Wow, it looks like more than 3 inches too. gulp!

 Set my trusty ol' serger for a 3 thread rolled hem and made sure 
I kept the row of stitching just to the right of the cutter.

Who ever invented a serger was a genius! That rolled hem is so nice. 
I can even imagine how long it would've taken me to hand sew a rolled hem.

That's the pile of satin and chiffon that came off the dress.


Ta-daaaaaaa.....even steven


Do you have some fun tricks that help you? Share!! After all...knowledge is power!!

Thursday, January 5, 2012

Short cuts, the geeky computer kind.

If you have a windows based computer, these keystroke short cuts should work for you. I am sure mac has some similar, but I just don't know about them. 

So, you want to use a little irregular punctuation or you are writing a recipe and you don't want to keep trying to find the goshed dang character map (which is where all the keystrokes are located.)
I am only going to list a few of the ones I use, but there are bunches that have key stroke shortcuts.
All the most common true type fonts have these punctuation marks, the fancy ones, rarely. Just saying.

Okay, time to practice:
Hold down your alt key.......

type 3....... then let go....♥

Hold down you alt key, type number, let go...that's the order.
Okay, a few of my faves:

0174....®
0176 .....° (degree symbol: 350°)
0188...¼
0189...½
0190...¾
0252...ü
0241...ñ
0233...é
0131...Æ’
0191...¿
0183...· (like a dot instead of a dash: 555·5555)
3...♥
1...☺
2...☻
7...• (555•5555)
13...♪
14..♫

Go and peruse the character map, they don't all have key stroke short cuts, but quite a few do!!

I have mine written on an index card, but I know several of them by heart or should I say: by ♥? 

A few helpful linkies:


for mac: