Showing posts with label fnsi. Show all posts

Saturday, October 27, 2012

October FNSI

It's been awhile since I signed up for the Friday Night Sew In, but I have been trying to sew.
This week I knew I was sewing soooooo I went and signed up at the last minute.
Can you say: procrastinista? Sure, I knew you could.

I can't show the completed blocks, because that would ruin the surprise, but I can show you some of the progress.......

We are all making Dresdens using Chateau Rouge by French General. Yummmmmm


I used five prints from each colorway


80 platelettes . Okay, blades...what ev..


The half way point...and boy, is there shrinkage.


Here's how I chose to do the "points".


Look how much smaller the sewn one is!
The blades are still the same length, but the seam allowance really made a difference.

I still have to mount them on the backing and do the embroidered center.  
Can't wait to see what I finally embroider!  
I best get to gettin cuz these puppies go out in Wednesday's mail and I got a houseful of family showing up from Sunday 'til Tuesday............... EEEEEK!


Saturday, August 18, 2012

I need another pincushion like a.........................

....hole in a jar.

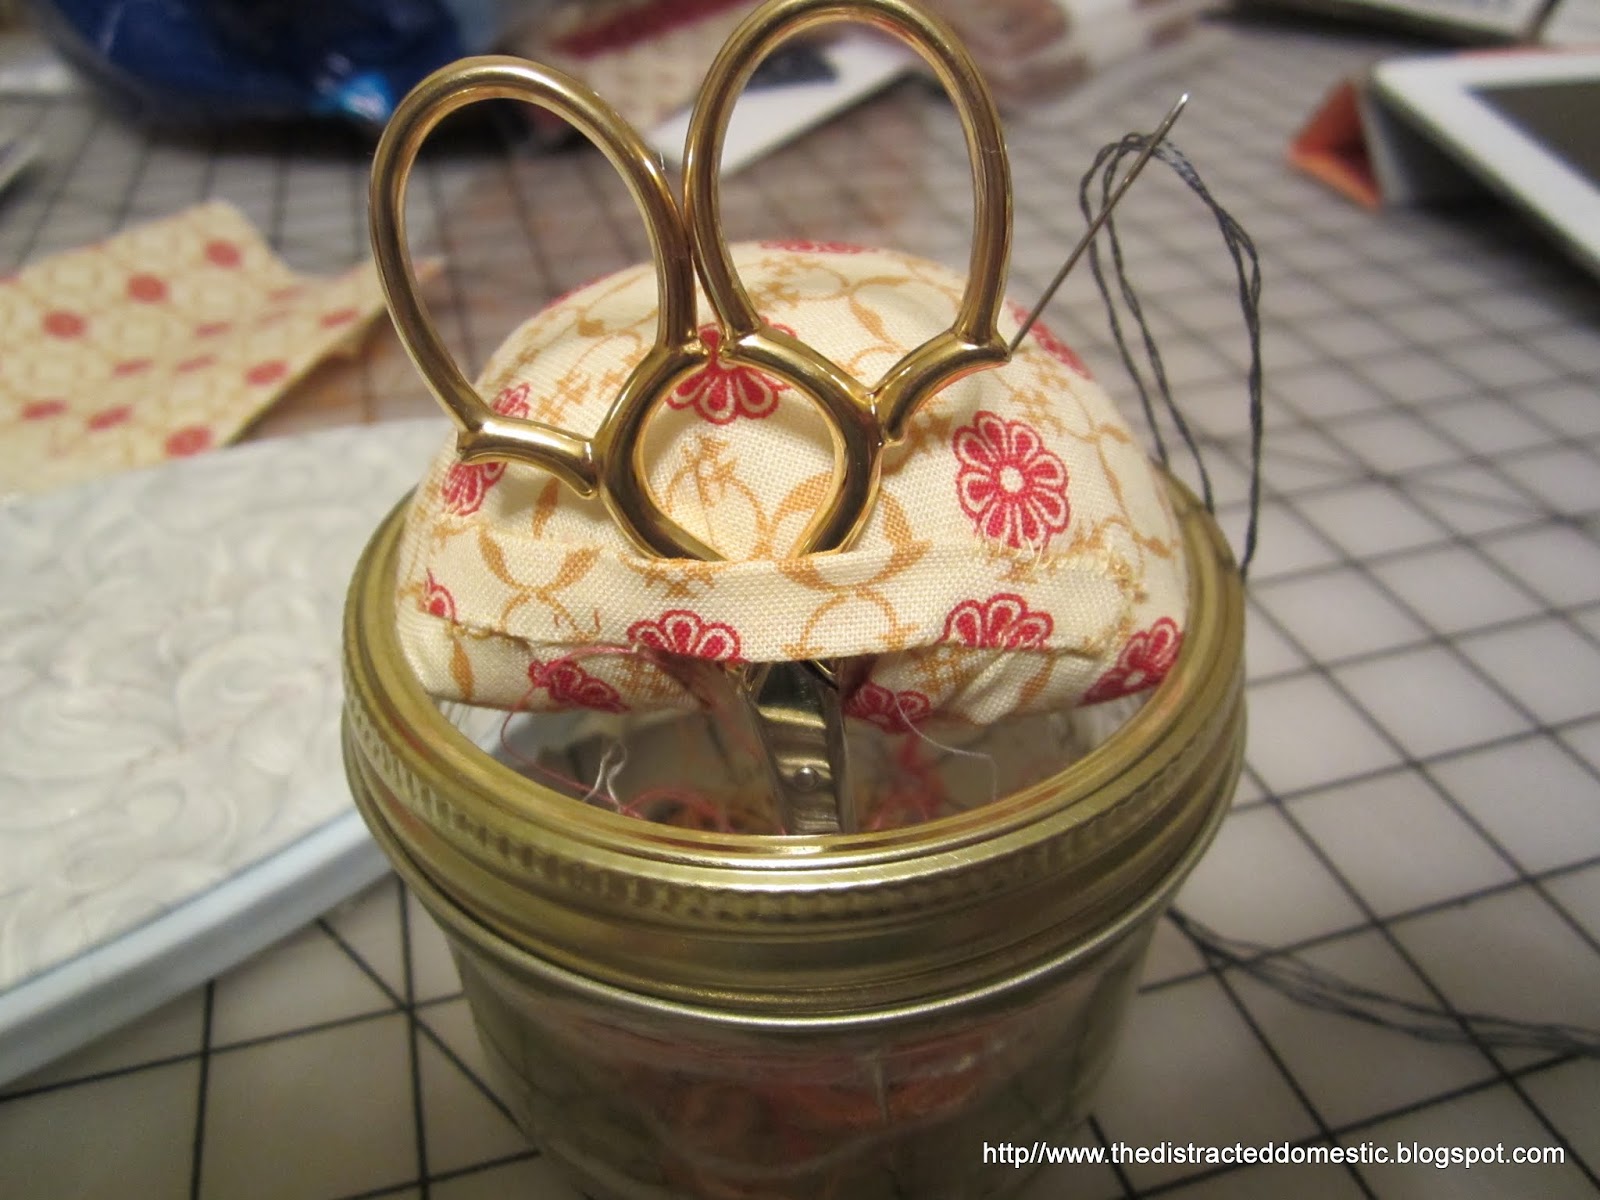
Wait! I do need a hole in a jar. What's that you say?  Yeppers. I wanted, nee, needed and ORT Jar. 
Old Ratty Threads or old ratted threads, I like ratty better, just saying. 

My new embroidery pincushion needed to be special since I already own far too many several pincushions that have specific uses. :-)  Please don't tell me every different color of pinhead and each style of pin do not need their own pincushion......cuz you would be soooooo be wrong.  LOL

The pincushion needed to have a place for my ORTs and I didn't want to be taking the lid off every single time I used my jar. First, what a pain, second, what if I lost the lid or had to fish it out from under the couch if I dropped it? Nosireebob, not happening. I was also tired of the same thing happening to my scissors; sliding down into the couch cushions......don't get me started.

My solution:

My ORT Jar

Side view. 
Love the Circa 1934 fabric. 
It was hard to cut into my stash because I really ♥ this fabric line.


Top view. (duh, right)


A hole so I can stuff my threads down in the jar.
Look ma, I don't have to take off the lid!!
 Wow, this pic makes me look like I have gigantor hands. lol.
The jar really is a good size. wide mouth and 12oz, about 4" tall and 3.5 inches wide.


A place for my scissors.
Sssshhhhhh, I got a new pair just for the jar. 
50% off plus another 20% off with a coupon.
Can't go wrong with ginghers!
I ♥ coupons.
I ♥ scissors that fit my fingers.
Okay, okay, I ♥ having a bunch of scissors. Jeepers already. 


Stem stitch practice.
Small lettering and stem stitch......not such a great combo. 
I am still going to finish it with the stem stitch, but live and learn, right?


To join in on the ORT Jar fun, check out this site.
http://itsdaffycat.blogspot.com/2011/11/totally-useless-stitch-long.html
 
She's calling it TUSAL the totally useless sew-along. You post a pic of your jar every full moon. 
That was last night/this morning. So this is my very first official ORT Jar post!!
Wooo and hoooo
 

Saturday, January 21, 2012

FNSI for January and mini tutorial

I actually got a lot done!! 


First, I made 8 burp cloths

A close up of the fabric. 
I HAVE got to find some that say " I love my grandma and grandpa!"


Next, I worked on a baby quilt
Look at those corners!!

This is my friend Denise's favorite block. It's called a disappearing 9-patch 
You start out with a basic 9-patch.

Then you cut it in half one way

Then you do the same thing the other direction.

You get blocks that look like this - - 4 blocks per 9-patch

Then you get to play with the layout
I still need to fiddle with it a lot more, then border it and quilt it and bind it.
My daughter just informed me that I need to make this exact quilt for her possible, future, child that she may or may not have. LOL  I can wait....a long time!!
Yes Denise, this one is yours...

Saturday, December 17, 2011

FNSI and tutorial

 Well, I got a lot accomplished. I made this stocking and took all the pics for a tutorial AND I cut out all the fabric for 12, twelve, pillowcases. Alas, not much happened in the ol' sewing room today and it ALL needs to be done the 24th. lol

On to the tute!!


First, get some paper to use for your pattern. I like old desk calendar paper. It's heavy and when you buy it at the dollar store or in March, it's uber cheap!


Find a stocking shape and size you like. Or free hand a design. I am not that good. lol


I hold mine down with these 'weights' 
I used green and red salsa to keep it festive. :-)

Stockings can be kinda fluffy, so hold down the fabric as you trace. 

After you're done, it will look like this....don't forget to add the seam allowance. 
I just cut my fabric a little wider, but having them on the pattern is better.

 Does it look the way you want?

No? Trim it until it does.

Time to measure for your cuff.


A whole bunch of measurements for the cuff. 
It will be 2 times the width plus one seam allowance
by
2 times the depth and 2 times the seam allowance
We'll come back to this is a bit


Cut out:
2 showy fabric
2 lining fabric
2 pieces of batting, fusible fleece or other materiel to make the stocking feel substantial.
If you use sturdy fabric or you aren't quilting it, skip it.


At this point, do any quilting or embellishing.  Lay your cuff out so you know where you want stuff.

Sew right sides together. Leave the top open.

 Turn the stocking side out. clip any curves if you need to.
Then put the liner in, wrong sides facing each other,


Match seams and pin into place....baste

 This is the link to a cuff tutorial I did last year. It's much more thorough than this one is.

 Make a loop or get some twill tape and cut it as long as you want the loop. 
Mine was about 5-6" long for a 3" drop.
Pin to the inside of the stocking in the seam area on the heel side

Now, cut you fabric according to your measurements.

Fold in half..drop sides together

Sew that one seam closed

Press it open

Fold over and make it all even and pretty

Pin to the inside of the stocking. Sew. Finish the edge with a zigzag, serger or pinking shears

Pull out the cuff. I signed my creation. lol

Fold down the cuff, pull up the loop and you are good to go.
Use this as a spring board to create a masterpiece of your very own. A family heirloom even!!
Trust me, it took longer to explain that to make. LOL
Merry Christmas!!

Saturday, December 10, 2011

FNSI- complete

This little one hour apron took me closer to three. LOL  Lots of interruptions 
Family, whatcha gonna do? 


 Going to embroider another Spock kitchen towel. 
I am not that good with eyes, but I'm getting there.

Not as much done as I wanted, but stuff that is done, nonetheless.
Happy sewing!

Saturday, November 26, 2011

Finished Files--mug rugs and coasters from fnsi

Well, it took a little bit of time, but I finally finished the items from my Friday Night Sew In.
(check my side bar for more info)

4 tag shaped mug rugs using a modified sweetwater pattern


2 sets of Flirty Fifties Coasters  
(I have enough fabric for 4 place mats too.   eeeeee)

I haven't really decided what I am going to do with all of it yet.  I am in a swap and I pretty sure a mug rug will be going her way. :-)


On my to-do list:
1) stocking swap
2) spock dish towel...got a request
3) got a request to make a white sock cow (that should pay for the christmas fabric I just ordered )
4) a few gift card holders
5) put up the star trek universe and other christmas decor
6) christmas shopping and menu planning (thinking smoked turkey and tri tip mmmmm)
7) christmas cards


There is probably a bunch more stuff, but this is what I am thinking about the most.


Time to get bizz-ay! 


memememememememeeeee
Just hear that jing jing jingling....la la laaaaaaaaaa something, something sleigh ride together with youuuuuuu

Saturday, November 19, 2011

FNSI - November with Dooney and Bourke

Well, I got a lot done, but not a lot finished. LOL  Maybe tonight?

I made 8 flirty 50's coasters and 4 gift tag mug rugs. Everything just needs to be turned and topped stitched.

I was going to work on them today, but the Christmas shopping bug bit me while I was taking the man/child to work. Alas, I bought only three giftees.....one for ME!! Bad me, bbbaaadddddddd (but in love) me!!


Now, picture this really, REALLY RED. Now tuck in the long strap.....
Santa hubby doesn't know his shopping is done yet. 
 
.
 Ahhhhhhhhhh

This is the red I am talking about .
I can't even tell you how yummy it is in person!!
I wonder if there is a matching wallet?

I purchased it pre-sale to save 25% but now I have to wait until the sale to pick it up. It's gonna be a lloonnggg 11 days, then I have to wait until Christmas day....maybe....